
Documentation
Bring Always On
to your store.
Help shoppers see your collection on themselves or a Twin, find their fit, compare options and build looks as they browse.
What are you setting up?
See what Always On includesShopify
Set up Always On in Shopify.
You’ll need Shopify admin access, an Online Store 2.0 theme and one eligible product with a clear image and a product code (SKU).
-
Install and connect.
Install SPREEAI on the Shopify store you want to connect. Open it under Apps, review the agreements and select Get Started. Choose a plan and approve the subscription in Shopify. The app connects your store automatically.
Installation guide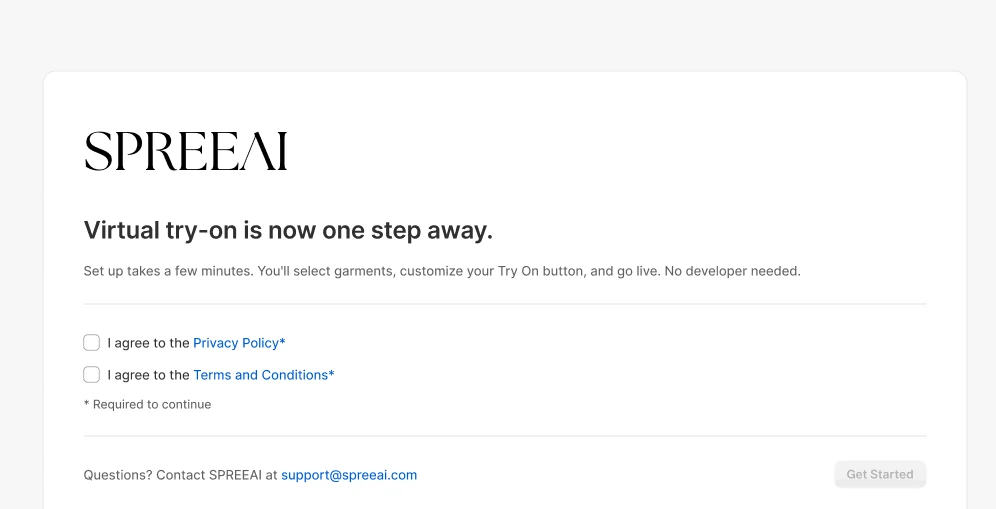
SPREEAI’s welcome screen in Shopify -
Prepare one product.
In SPREEAI, open Products and choose Sync Products. Select one item and check its category. Wait for Ready. If you see Action Required, follow the fix shown in the app.
Check product eligibility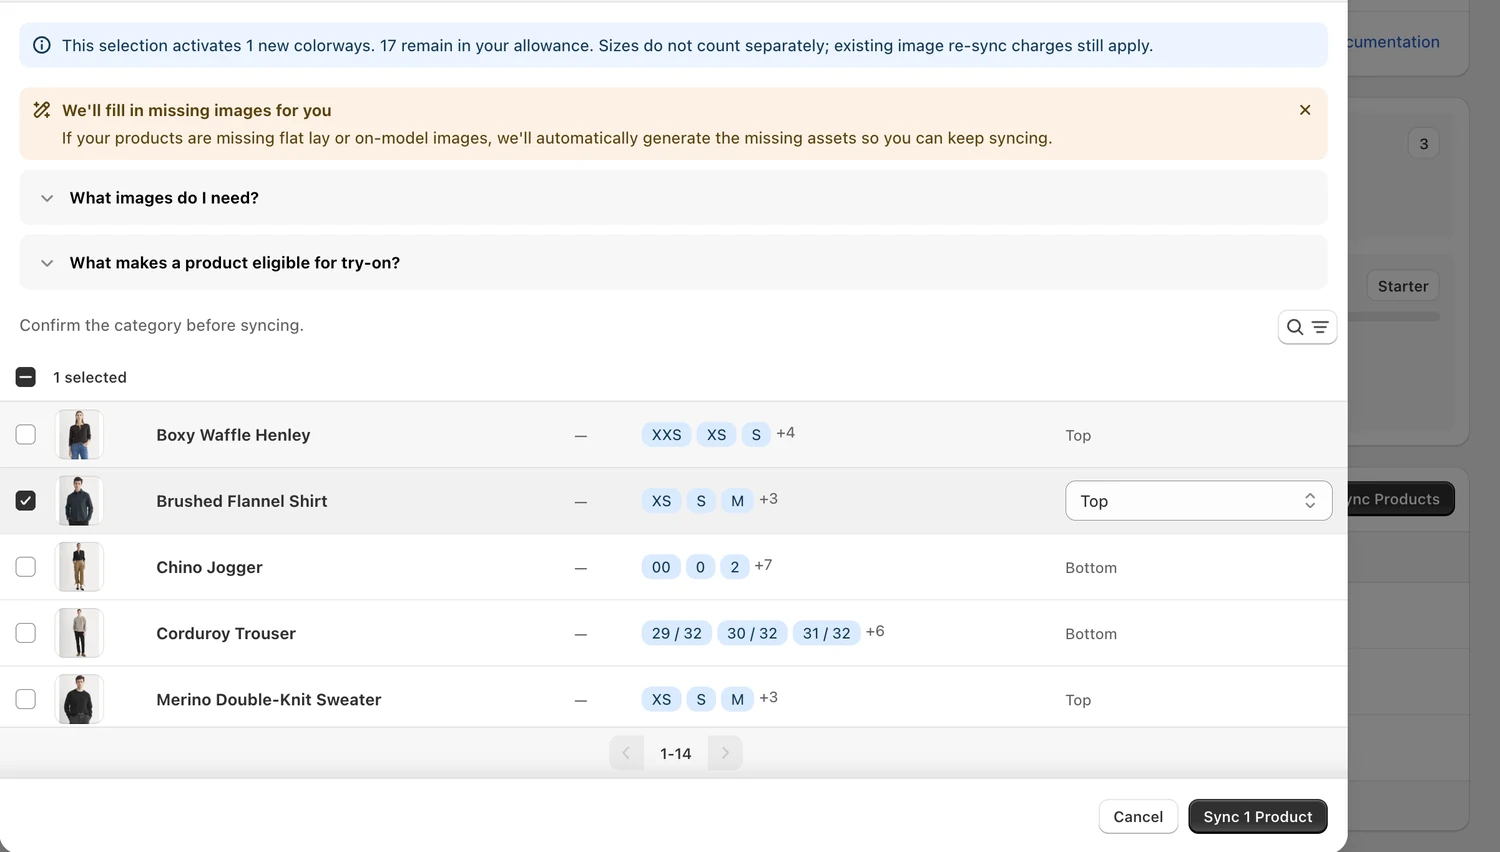
Start with one item in the Sync Products window -
Place the fitting room.
Open Settings → Customize storefront. In Shopify’s theme editor, place the SPREEAI Fitting Room block on the product template and save. You can adjust the wording, colors and available shortcuts.
Theme setup guide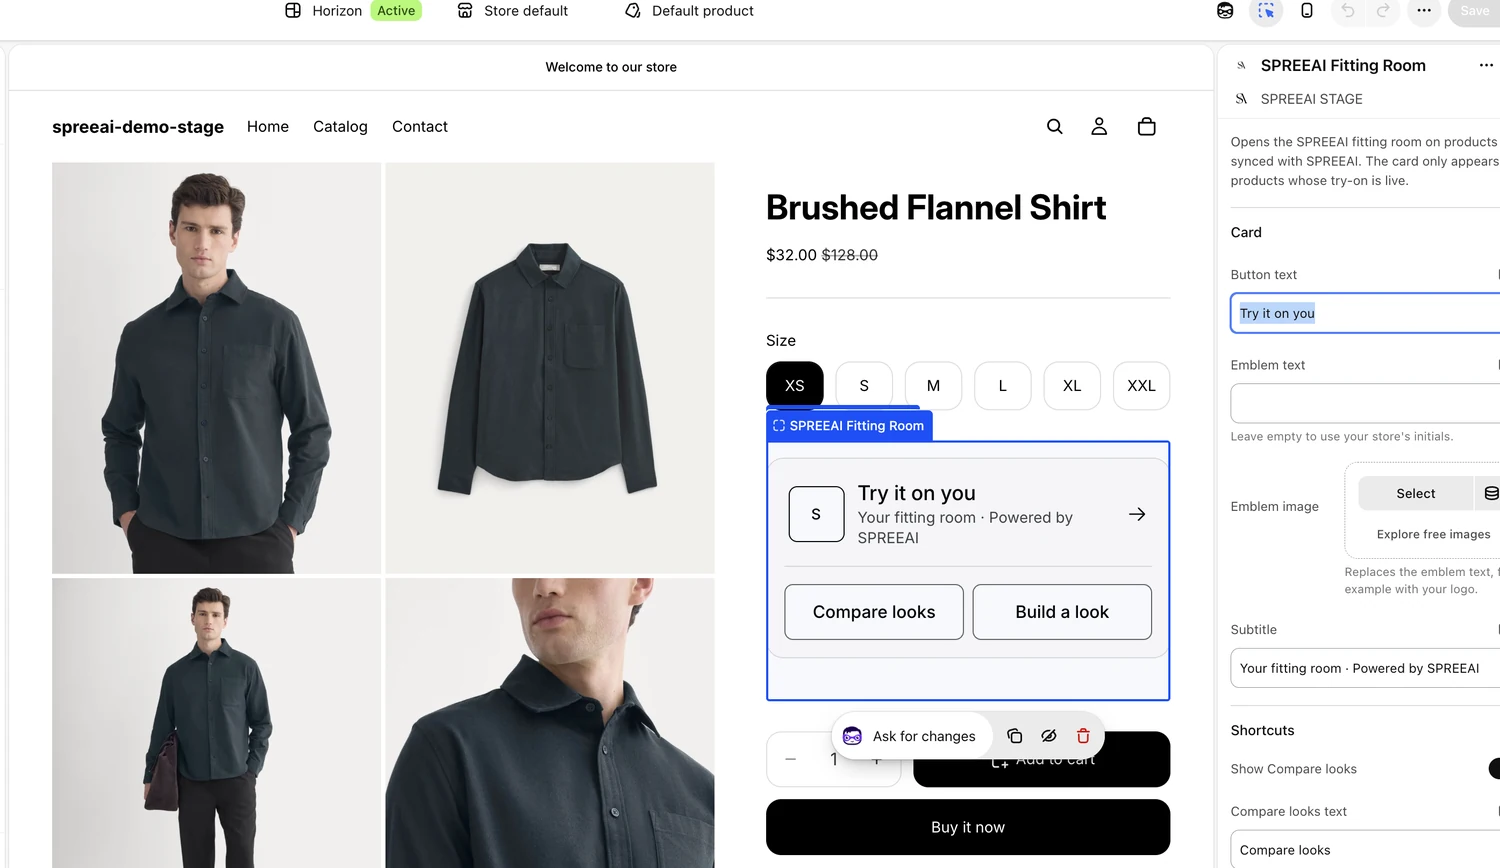
The Fitting Room block in Shopify’s theme editor -
Enable it and try it yourself.
In Products, switch Try On Status to Enabled for your Ready item. With Virtual Try-On switched on and the block saved in your published theme, open the live product page on a phone and a computer. Check that the right product and color appear.
The theme editor previews the layout. Run the full try-on on your published storefront. Test try-ons count toward your plan.
Preview and go-live guide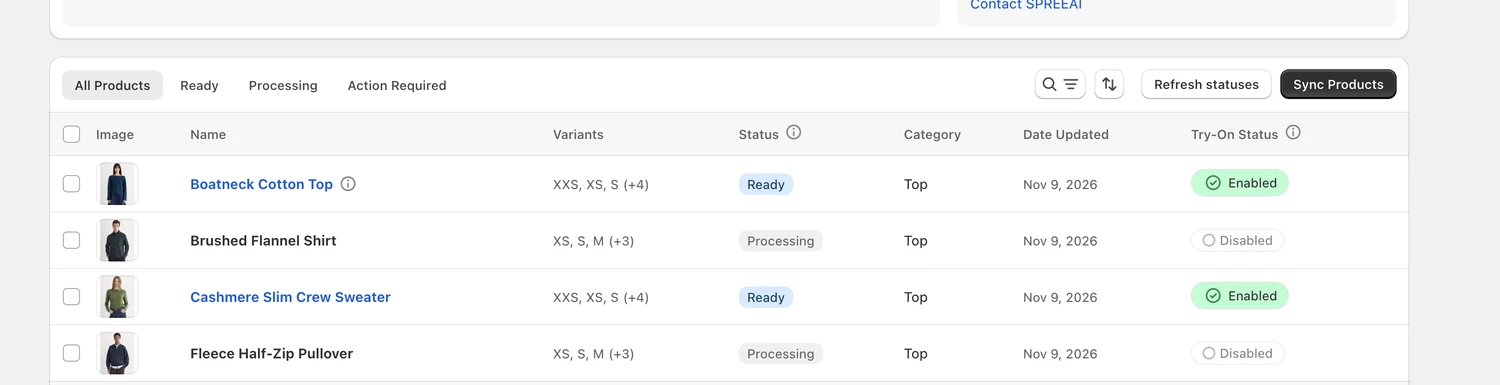
Use the Try On Status column to control visibility
Web SDK
Add Always On to your website.
Your web team uses the Web SDK to add a Try On button to your product pages. It opens a fitting room hosted by SPREEAI, with features based on your integration.
Get your test access.
Ask SPREEAI for a test client ID. Choose one product and send the product ID, variants and clear garment images for processing.
Connect one product page.
Give your developer the Web SDK quickstart and the ID for the processed garment. Ask them to place the button near the product options and match it to the selected variant.
Check the shopper journey.
On your test site, open the fitting room on a phone and computer. Check the garment and color, and confirm that the right size and variant go into the cart if you enable that option.
For your developer. SDK 2.0 is the product release name. The current setup guide uses Web SDK v3.0.0. Use the client ID issued for your environment and keep private credentials on your server.
Partner API
Connect your own systems.
Use this route if your team needs a system behind your website to exchange data with SPREEAI, for example for an approved catalog workflow.
Describe the job.
Tell SPREEAI which system you want to connect, what data it needs and what you want it to do. Partner Engineering will confirm the supported workflow and access.
Share the reference with your team.
Your developer uses the approved API reference and issued test credentials. Keep secrets on your server and use separate credentials for test and production.
Test a small sample.
Confirm that product and variant records match, and check how your system handles an unavailable item or a failed request before moving to production.
Mobile SDKs
Bring Always On into your app.
Give your iOS or Android team the platform reference and agree which product screen and features to use first.
Choose the first app screen.
Pick one product detail page in your iOS or Android shopping app and agree who owns the integration.
Confirm the package and features.
Ask SPREEAI which package, sign-in setup and features apply to your app. Give your mobile team the platform reference and the first processed garment.
Run it on a device.
In a test build, open try-on, check the product and close the experience. If your app supports cart handoff, make sure it returns the correct item and size.
Always On
A fitting room for the whole shopping journey.
Shoppers choose a photo or a Twin once and keep that perspective as they browse your collection. Choose the features that make sense for your store.
Explore the PlatformSetup questions.
Quick answers for the first product you put live.
All technical guidesDo I need a developer?
For a standard Shopify theme that supports app blocks, the store admin can install SPREEAI, sync products and place the block. Ask your web or app team to implement the Web SDK, API or native SDK integrations.
What photos should I start with?
Use a clear front view of one garment with even lighting and a simple background. If your Shopify product comes in several colors, assign each color its own variant image. See the photo guide
Why isn’t the Shopify button showing?
Check that the subscription is approved, Virtual Try-On is on, the product is enabled and visible, and the app block is saved on the right template in the published theme. See the complete Shopify checks
Can I add products later or hide try-on?
Yes. In Shopify, sync more products when you’re ready. Switch Try On Status to Disabled for a product to hide its try-on. Its prepared product data and theme settings stay in place.
Who can help if I get stuck?
Email support@spreeai.com with the product ID, your setup type, the device you tested and what happened. Keep access keys, tokens and shopper images private.
Need help getting started?
Tell us how you sell and which product you want to try first.